



Overview
This tutorial builds and previews your first AR filter in Nosmai Studio, then exports it as a .nosmai package. It starts from a template so you see a finished filter's layers, previews it live on your camera, changes one layer, and exports. By the end you will have seen the whole Studio workflow once.
Product: Nosmai Studio · Platform: macOS, Windows · Updated: 6 October 2026 · Reading time: 15 minutes
Prerequisites
- Nosmai Studio installed and signed in. See Install and sign in.
- A working camera.
1. Open a template
A template opens as ordinary editable layers, so it is the fastest way to see how a filter is put together.
- On the home screen, open Templates in the left rail.
- Open Cat Ears. It loads into the editor.
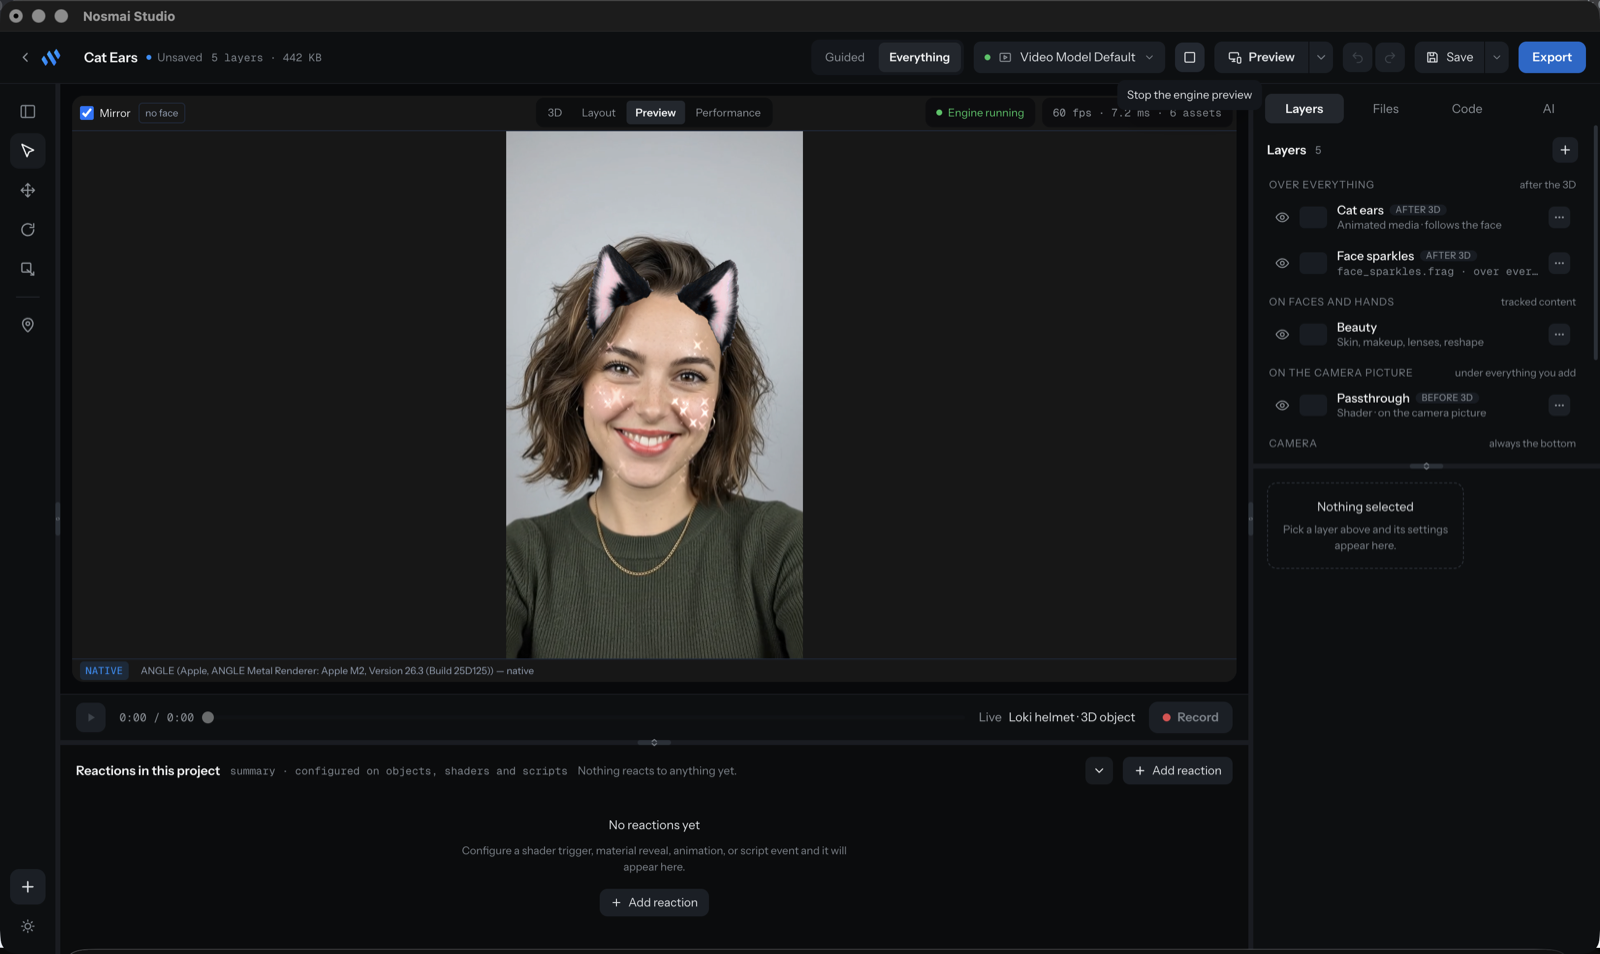
The editor shows the filter's layers on the right, grouped by where they draw: cat ears over everything, a sparkle shader, a beauty layer on the face, and the camera at the bottom.
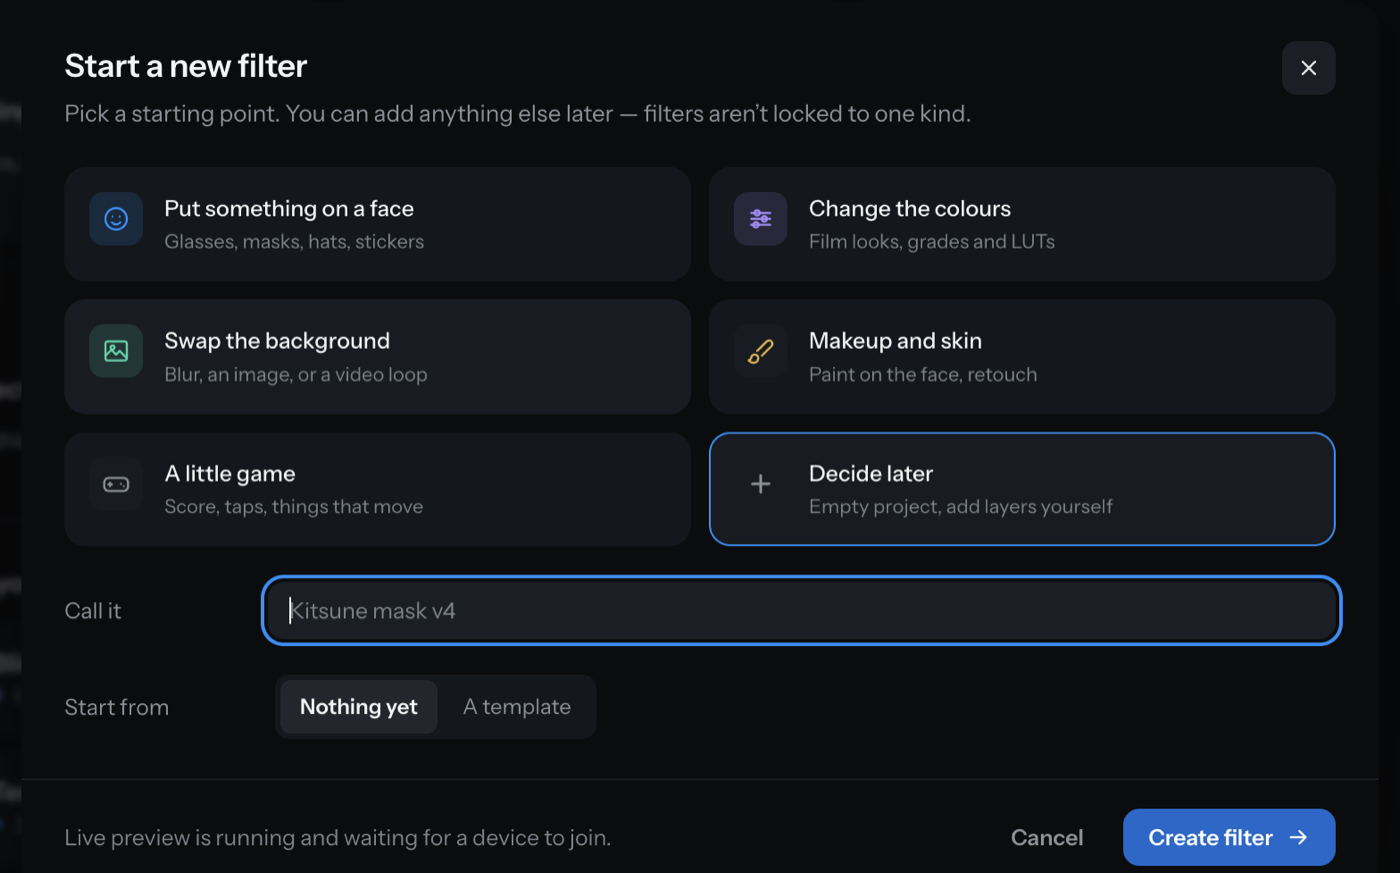
To start from scratch instead, press New filter on the home screen and pick a start point. Either way, a filter is just layers you can add to and change.
2. Preview it on your camera
- In the top bar, confirm the preview source reads Camera. Camera is the default; if it shows a bundled model instead, open the picker and choose your camera.
- Press the play button in the top bar to start the engine preview.
- Allow camera access if your system asks. The preview opens on the Preview stage view and shows the filter on your face.
The cat ears follow your head, the sparkles track your face, and the beauty layer smooths your skin.
3. Change a layer
- In the Layers panel, select the Beauty layer.
- The inspector opens below the layer list. Open the Skin controls.
- Lower Smoothing toward
0.2. Watch the preview update live as you drag.
Every layer works this way: select it, and its properties appear in the inspector beneath the list.
4. Check performance
- In the stage view switcher, open Performance.
- The summary cards show Texture usage, 3D geometry, Package size, GPU impact, and FPS, each marked Good, Warning, or High.
- The By layer list shows what each layer costs, heaviest first.
Performance warnings never block you. They are guidance so a filter runs well on a phone before you ship it. See Check performance.
5. Export the package
- Press Export in the top bar.
- Choose an output folder.
- Leave the
.nosmaipackage selected (it is always produced) and pick any preview files you want alongside it. - Fill in the filter's name and other distribution details.
- Press Export.
Studio writes a folder named after the filter, containing the .nosmai package and the previews you chose.
Verify it worked
- The preview showed the filter on your live camera.
- The Beauty change updated the preview as you dragged the slider.
- The output folder contains a
.nosmaifile (and your chosen previews).
Common problems
| What you see | Why | Fix |
|---|---|---|
| The preview is black after pressing play | The engine has not painted a frame yet, or camera access was denied | Allow camera access and give it a second; if it stays black, stop and start the preview again |
| The template will not open | Studio is running in a browser, which cannot read files from disk | Use the desktop app |
| Export is greyed out | A required distribution field is empty, or no output folder is chosen | Choose an output folder and fill the required fields (name, ID, author, type) |
| A preview video option is disabled | The preview source is a still image, which cannot make a video | Choose a camera or a video preview source to produce the mp4, webp, and gif |
