



Overview
A filter in Nosmai Studio is built from layers. This page covers how to add one, the kinds available, and what asset each kind takes. Open the add-a-layer sheet from the + in the Layers panel, pick a kind, and set its properties in the inspector.
Product: Nosmai Studio · Platform: macOS, Windows · Updated: 6 October 2026 · Reading time: 8 minutes
Prerequisites
- A project open in the editor.
- For a Script layer, Everything mode (see Modes and views).
Add a layer
- In the Layers panel, press the + at the top. The add-a-layer sheet opens.
- Pick a layer kind. The kinds are grouped by where they draw.
- For a layer that takes a file (an image, a model, a LUT, audio), choose the file, or add the layer empty and choose the source later in its inspector.
- The new layer appears in the Layers list. Select it to open its inspector.
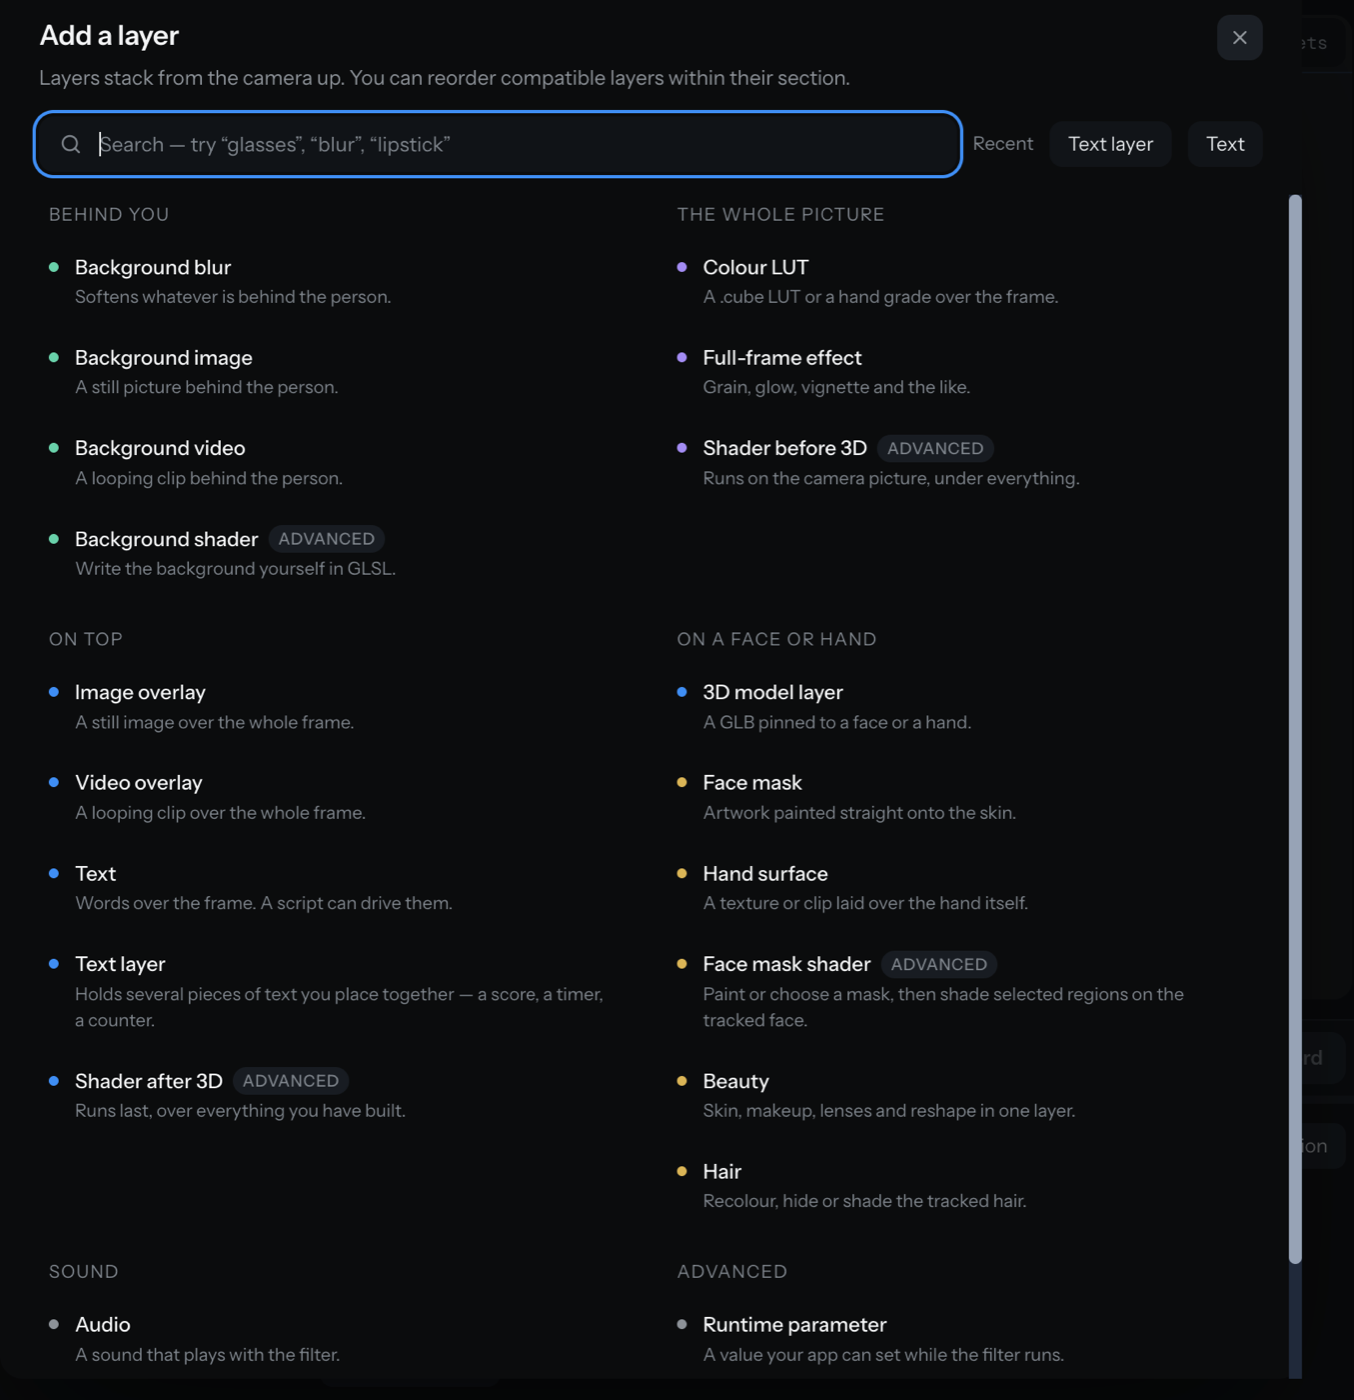
The layer kinds
Behind you (background):
- Background blur, background image, background video, or a background shader (advanced).
The whole picture (colour):
- Colour LUT (a
.cubefile or a hand grade), a full-frame effect (grain, glow, vignette), or a shader that runs before 3D (advanced).
On top (overlay and text):
- Image overlay, video overlay, Text, a Text layer group (holds several pieces such as a score and a timer), or a shader that runs after 3D (advanced).
On a face or hand:
- 3D model layer (a GLB pinned to a face or a hand; picking it asks whether it goes on a face or a hand), Face mask (artwork on the skin), Hand surface, a Face mask shader (advanced), Beauty (skin, makeup, lenses, reshape), and Hair (recolour, hide, or shade).
Sound:
- Audio: a sound that plays with the filter.
Advanced:
- Runtime parameter (a value the host app can set while the filter runs) and Script (Lua, in Everything mode only).
What each kind takes
| Kind | File formats |
|---|---|
| Image or overlay | png, jpg, jpeg, webp |
| Media (image or video) | png, jpg, jpeg, webp, gif, mp4, mov, webm |
| 3D model | glb, gltf, vrm |
| Colour LUT | cube, png |
| Audio | mp3, wav, m4a, aac, ogg |
| Font (for text) | ttf, otf |
You can also drag a file onto the editor to import it.
Verify it worked
- The new layer appears in the Layers list, in the group for its kind.
- Selecting it opens its inspector below the list.
- If the layer takes a file and you added it empty, the inspector shows a Choose or Replace control for the source.
Common problems
| What you see | Why | Fix |
|---|---|---|
| The Script row is disabled | Scripts need Everything mode | Switch to Everything in the top bar |
| Export refuses with an empty source | A media or model layer has no file chosen | Choose a file in the layer's inspector, or remove the empty layer |
| A dropped file did nothing | The format is not supported for any layer | Convert it to a supported format from the table above |
| The layer does not appear in the preview | It needs a face or hand that is not in view, or it is hidden | Show a face or hand, and check the layer's eye toggle |
